Wednesday, December 28, 2011

Holiday Winter Doll Makeup Tutorial

Hello Everyone!!!! Happy Holidays! I'm finally done this term, and have 1 week-ish of vacation time spent in Toronto. However, sometimes at night, I still get uber bored, and since I've never created a look with red lips, I've decided, why not? Anyway, this is a look that'll even make your teeth look whiter!(If you have yellow stained teeth like me...ewww)
Enjoy,
xoxo


This is the lip gloss that completes the look (not recommended for everyday look though!)
@ Winners for only $5.99 CAD

With Flash:


Without Flash:


Sunday, December 25, 2011

Plastic Surgery Makeup (Without the need of Plastic Surgery)

Ever since when I was a teenager, I realized that my nose has been very flat =_= and truthfully, I have considered surgery or a nose injection (and I still am) because I don't have a nose bridge, and its really frustrating when I wear glasses because alot of the times, my glasses keep on sliding off, and of course, there's that beauty side (a flat nose, in my opinion, just doesn't look that flattering). So recently, I've been experimentation with make-up and discovered a way how to "fake" a nose bridge and as well as making your eyes seem bigger and your face slimmer.
Enjoy
xoxo.

This is how I looked before makeup

After Makeup:


 And this is what it looks like in natural lighting (without the light shining on my face)

Saturday, December 3, 2011

Absolute Total Diamond Skin 79 BBcream Review

So far, Skin79 has been my favourite BBcream brand ever, and recently, I've decided to spend a little more on the Diamond Version of this bbcream. To me, this one feels no different than my already favourite, Super+ bbcream also by Skin79.However, I can feel that it gives a more thicker coverage than the Super+ Bbcream, and it feels like it has the same coverage as the Missha BBcream. Moreover, I feel that this cream gives a better coverage than most foundations. Again, it gives a rather dewy finish and sort of feels oilly, so moisturiser is not needed. The only difference that is labelled is that this one has a better SPF37 PA++ whereas the other one only has a SPF25PA++. 


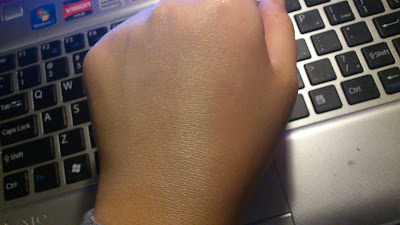
The shade is slightly lighter than my hand

 And this is how it looks like when used as a foundation: (I only use the bbcream + translucent powder to set, and used NO concealers)

Notice the imperfections on my forehead? It does a good job at covering it


I think this is the bbcream that I would use during my bad skin days. It is quite expensive when it is bought at pmall (around $30-$40). Fortunately, I got this from ebay which was only around $15. I think I have just found my second favourite bbcream =)

Friday, November 18, 2011

My Beauty Diary Eye Mask Review

Recently, I've visited T&T to buy some My Beauty Diary masks, and came across My beauty Diary Eye Masks! They were around the same price as 1 box of masks (10) $7.99, but the eye masks only came in 7 per pack, so they were kind of expensive.
cute packaging!


So what these masks are are vitimin C enriched Eye masks, and they have the special design that covers the top, bottom and the side of the eye.

When taken out of the package, it looks like this:
kind of like fishes with a big mouth =D


This is how it looks on the eyes:

pretty scary, LOL
I love this mask the first time I tried it, after 20 minutes, my dark circles seem less visible as well as those fine wrinkles under my eyes (which I have alot of)

Monday, November 14, 2011

Back to Brunette

2 Days ago, I really got bored of my hair colour and decided to change it back...closer to my natural hair colour but with reddish undertones. I've been wanting to use those Japanese hair dyes instead, but one of the dyes do not contain enough dye to colour all my hair, not to mention, they are pretty pricey, more expensive than the L'oreal hair dyes which are priced at around $12/box. I picked up a Clairol Nice & Easy Foam Dye which is priced around $8.99/box


 This is what the box contained... and the instructional manual


 What it looks like when applied onto my hair....


End result


I haven't had dark hair in quite awhile, so this will be taking some time getting used to =)

Wednesday, November 9, 2011

Quick & Easy Day to Night Eye Makeup

Ever since the first moonshadow baked Palette that Sephora featured, I've fell in love with it. Sephora recently brought out another palette, this time, featuring silver laced design called "In the dark". I love the colours that came with this palette, and it made eye contouring so easy! The top row have the lighter eyeshadow shades and the bottom row has the darker contouring shades to match! You don't necessary have to use the combo that's suggested, you can also mix and match the colours. They are so wearable, and sparkly!

So with that in mind, I've decided to do a really simple eye makeup that takes you from day to night without taking any makeup off! Instead, just layering it on.


Day Look:


Night Look:


Friday, November 4, 2011

Bliss Make Over Your Mani Review

 Yesterday, I stopped by Winners again (my FAV place for discounted beauty products). And I picked up this

Yes! The original price for this was $54.00 CAD and I got it or only $30.00 CAD. It is also avaliable at Sephora for the original price. 


So what this essentially is is a hand recovery set. It makes your rough hands super soft! The package contains:

Hand Cream


and gloves 


The gloves are even coated with vitimin infused gel-lining!
The best thing about this is that the gloves can be worn alone for 20 minutes OR with the intensive hand cream to achieve the hand softening effect. 


So, first. here is what my hands looked like before: (notice all the cracks and peels)

After applying a small amount of the hand cream on both of my hands and then I slip on the gloves for 20 minutes. The results:


The cracks and peels are alot less noticeable and my hands feel super soft! Its recommended that you use this treatment twice a week to treat your hands =). 


Thursday, October 27, 2011

Shiseido Eyelash Curler Review

II have recently heard alot of raves going on about the Shu Uemura eyelash curler. I was in the New York City for the weekend and wanted to head to Sephora (they have a Sephora on every corner!) to pick up one. Since they are much cheaper there ($19 USD compared to $30 CAD). It around 9pm and was walking around near the Times Square and I finally found a Sephora. Unfortunately, they were out of the Shu Uemura eyelash curlers so I just picked up the closest thing to it, which is the Shiseido Eyelash Curler. I went online and saw many beauty gurus were bloging about the difference the two.  Since I've never had the chance to try the Shu Uemura Curler myself, I don't know its performance. However after trying otu the Shiseido curler, I loved it!!


The Package came with the curler itself and an extra replacement rubber band. the curler is flatter than most of the eyelash curlers which fits the Asian eyeshape really well. Another thing about the curler is that instead of plain metal coloured, its in black which gives a more of a professional tool feeling.

I usually wear false eyelashes since its really to hold a curl on my lashes. But with these curlers, they really curl my lashes! In these pictures, I have curled my lashes and have the Benefit Badgal Brown Mascara


Ofcourse, the curl doesn't give you the effect of false lashes (that's the mascara's job) but nonetheless, its a really good natural effect. Overall, I'm really happy with the performance of the eyelash curler =)